In today’s blog we’re going to take a deeper look into how to properly set up your plate carrier for tactical usage. But we’ll approach this with a twist, because rather than showing you yet another example like others do, we’re going to fully start from scratch.
![]()
Meaning we’re going over the fitting, to the full thought process that goes into setting up such a carrier and even up to the final testing to help you guys get yourself the setup you personally require.
But before we dig into this subject if you want quality gear and like our work, please support us by buying over our store!
WHAT WE’LL DO DIFFERENT COMPARED TO OTHERS
As mentioned, a lot of people making these kind of videos are basically showing their personal setup and than they call it “how to setup YOUR plate carrier”. In our eyes that’s not a how to guide, that’s just giving an example and that is absolutely not what we’re going to do in this blog today.
The approach we’ll be taking today is more like I’ve just got my carrier and other stuff that will go along with it & now what?
We ourselves use plate carriers for doing both Airsoft and Milsim events with an approach that’s as realistic as possible. And yes, that also means using realistic capacity magazines.
For this we obviously also train and learn from people in the professional world after which we translate this knowledge into our videos. So just so you know, we’re not just talking bullsh*t here.
PLATES ARE A MUST!
Before we go in this whole setup process, we first want to mention that a plate carrier absolutely needs plates!
We’ve used our carriers without plates a while back and we must say, the difference is certainly noticeable. They’re not called “Plate” carriers for nothing.
Anyway, whatever sort of plates you use, front and back plates in such carriers are definitely a must. What’s not necessarily needed are side plates, so that choice is fully up to you. Only do mind, more plates do bring more protection but also make you heavier and bulkier which limits your movement capabilities more.
Now that you’re aware of this and you’ve got your carrier with plates ready, we’ll go over to the first step which is fitting your plate carrier.
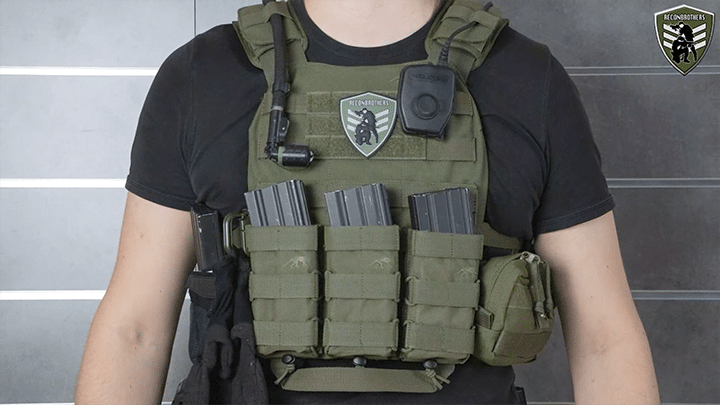
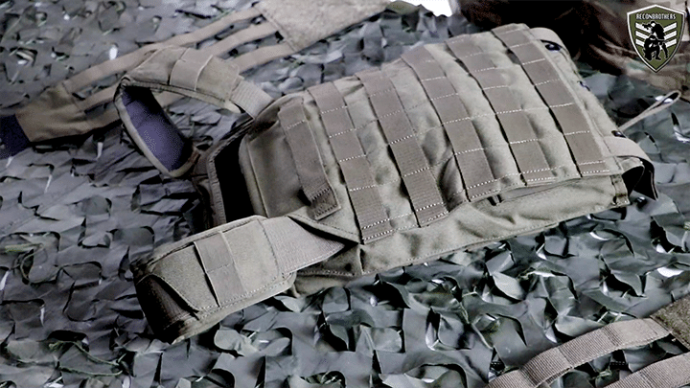
1. FITTING THE PLATE CARRIER
Important to know is that this is done before attaching any sort of pouches or anything else! A carrier is designed to protect your vital organs, so if you carry one make sure to carry it correctly. And yes that also means if it’s even just for show, because it will already make a difference in comfort if it’s worn correctly. For this, the easiest way to get this fitment done is to have a buddy with you to help you out.
STEP 1: TAKE SIDE PANELS OFF
Before you start to make any adjustments, you have to take off the side panels of the carrier first.
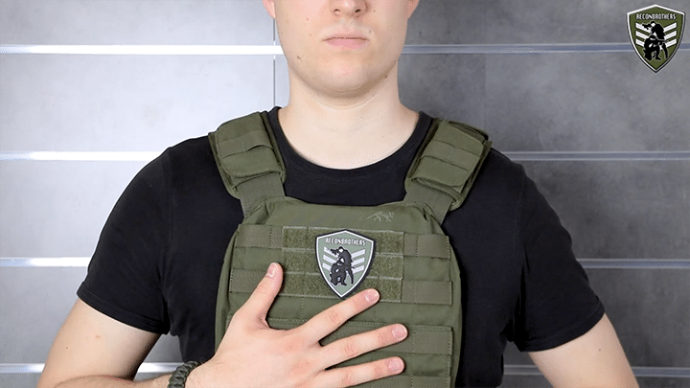
STEP 2: FITTING THE FRONT PANEL
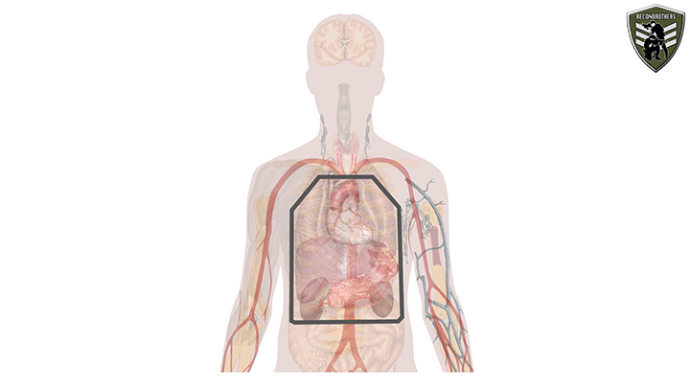
Once that’s done, you’re going to take your front panel and hold the top of it to about the width of two fingers beneath your collarbone. This ensures that the most vital organs are covered by the plate.
STEP 3: FITTING THE BACK PANEL
As for the back panel, your buddy is going to set it to the same height as the front panel and adjust the shoulders until the front and back panel are both correctly set.
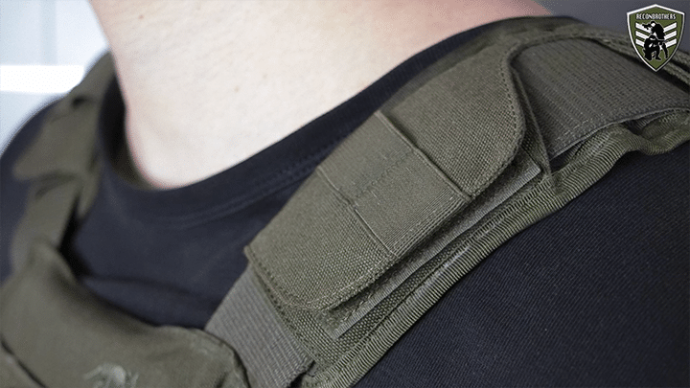
STEP 4: MIND THE SHOULDERS!
Also when doing so, make sure that the shoulders are equally adjusted, so that you’re not walking crooked and mind that the shoulder pads are in the right position as well.
STEP 5: Fitting side panels
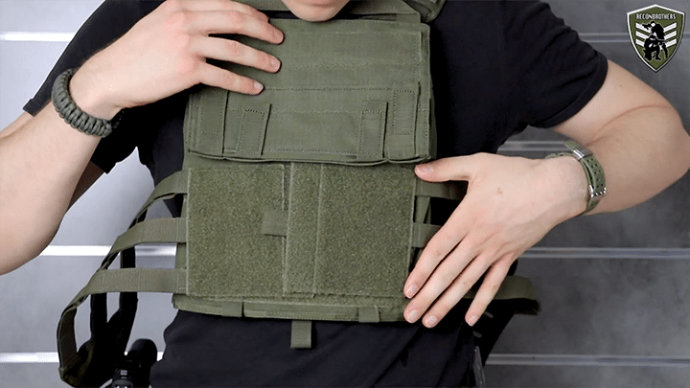
Next, to set the side panels you’re going to Velcro them on the front panel and your buddy is going to set them on the back panel. After that’s done you’re going to put it to the test.
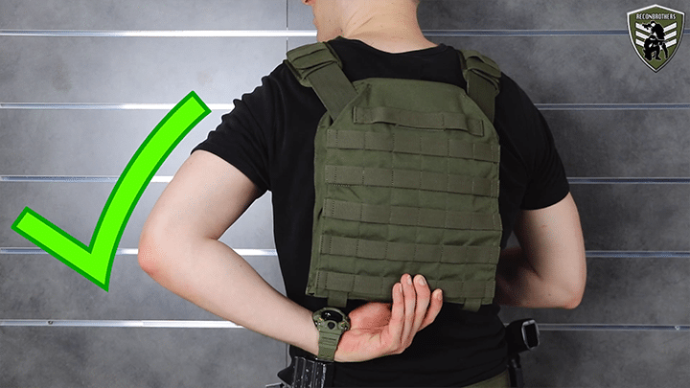
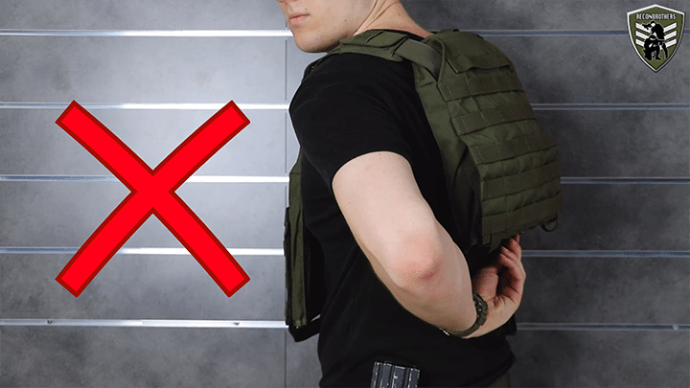
STEP 6: TESTING THE FITMENT
In order to test your fitment, you’re going to bend forwards and backwards, bend sideways and put your arms up to feel if there’s anything pinching or if there’s any shift in movement of the carrier.
Also when filling up your lungs by breathing in, you should feel the carrier pushing on your body, but not in such a way that it’s becoming uncomfortable. If something doesn’t feel correct, adjust where needed.
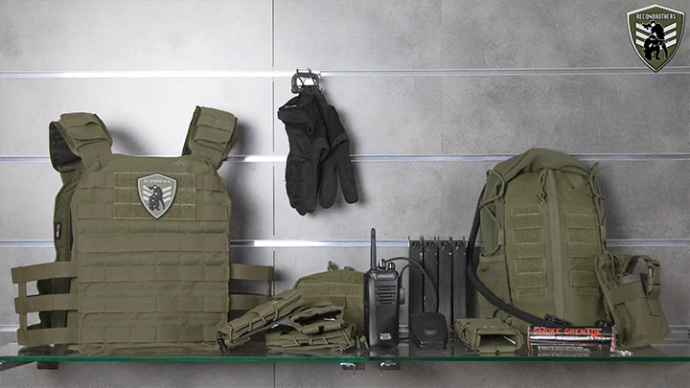
Ok, so now that your plate carrier is set to your sizing we can go over to the fun part which is to make ourselves into a small walking armory.
2. SETTING UP THE PLATE CARRIER
BUT BE AWARE!
1. There’s no such thing as the overall best setup, because it depends on what you do, what you need and how you use it. Yes, you can get some ideas from examples of others, but it will be rare to have it 100 % the same as someone else’s is.
2. The second thing you need to be aware off, is that you will have to make compromises when setting up your plate carrier. Meaning there will always be some things you would’ve liked to see differently, but that don’t seem to work in some way.
3. And the third thing is that you will make changes when progressing further to make it fit your needs better. Because some things might interfere when using your carrier in the field or on the range and that’s also one of the reasons why training in full gear is so important. So you become aware of those issues and you can make adjustments for when it matters.
Just so you know, we ourselves mainly do force on force activities and that’s where our experience comes from. So that being said, we can now go over to the setup process.
BEAR IN MIND
For military and law enforcement it’s highly possible you need to deal with certain unit restrictions or guidelines which you will need to consider. But if you’re a civilian like us, you can take it in all directions you want. However, whatever you put on your carrier, make sure it’s only stuff you really need. You don’t need to fill every MOLLE loop that’s available. It will only make you more bulky and slows you down.
As for us personally, we always keep three key things in mind, namely easy access, efficiency of movement and minimal stuff. Once our setup doesn’t meet one of these three specifications, it’s back to the drawing table and keep making adjustments until we get it right.
3. CONFIGURING YOUR SETUP
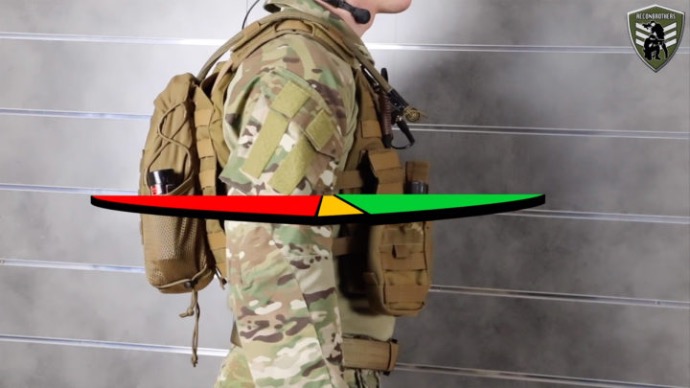
Before configuring your setup it’s important to know what your dominant side is, because this will influence your layout. Also mind what your personal access space is, because you can easily grab stuff up to an angle of 160°. And it’s doable but difficult up to 180°, but beyond that you can’t efficiently reach your stuff on your own carrier.
AVAILABLE SPACE

In order to actually configure your carrier setup, you first of all need to take into count how much space is available for your pouches and all the other stuff.
“QUICK ASSEMBLE”
Once that’s done, you’re going to lay-out your pouches on your carrier and make what we call a "quick assemble”. By this we mean you only attach pouches with a single MOLLE loop. This so you can easily undo them and believe us, it will happen that you need to reposition them. But by doing it this way, you’ll save your fingers by not needing to detach and attach your pouches all over again.
Once we’re at the point where we’ve done some of the first testing in this blog we’ll mention when you can fully attach everything.
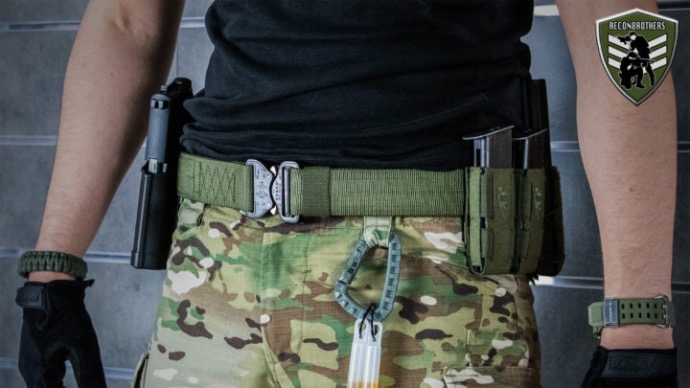
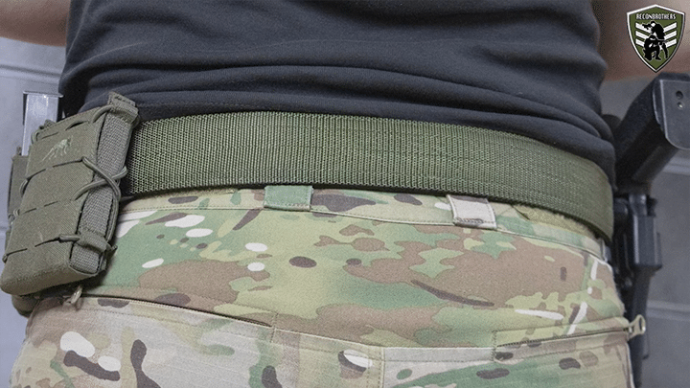
BELT CONJUNCTION
When working on your configuration, bear things in mind like the conjunction with your belt if you’re using one, so that there’s no interference. If you’re in need for a belt example or want to know what sort of belt will fit you best. These are also subjects we’ve already covered a while back. So, if you want to check those out, you can find them by clicking the images below.

ALSO MIND

That mentioned, also other things you need to mind are the sizes of your pouches, their weight, the access to your pouches, how much you will need to access those pouches and also how their position might limit your movements like when running, crouching or even going prone. For this it’s even recommended to fill your pouches to get a better idea of what works for you.
To give you some ideas to help you out in configuring a setup we’ll go over some thoughts processes that need to be considered for important parts of your setup. Let’s start with the front panel first.
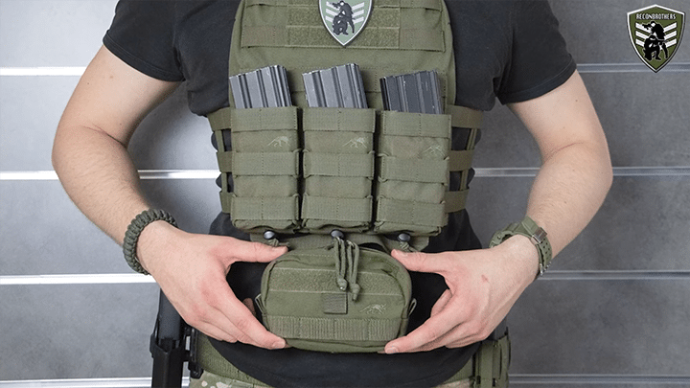
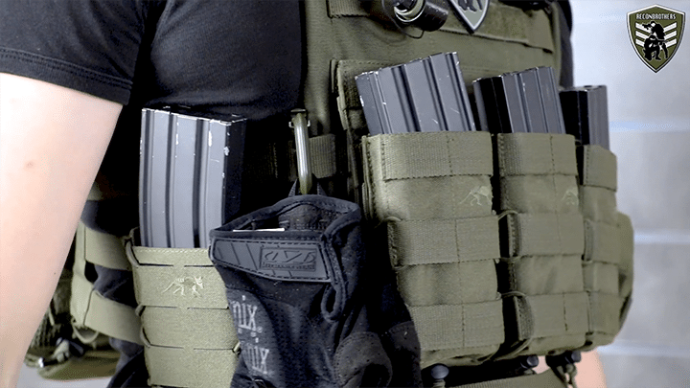
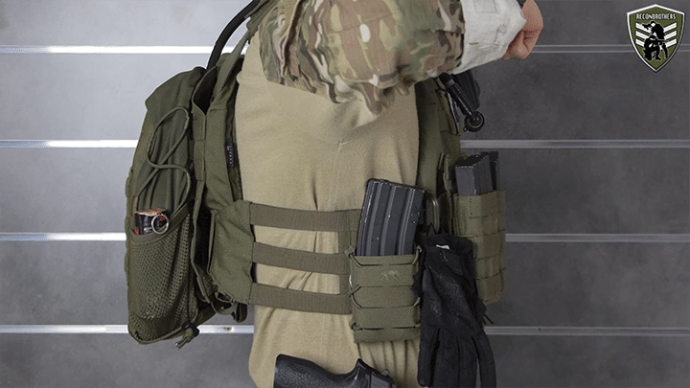
4. FRONT PANEL OF THE PLATE CARRIER
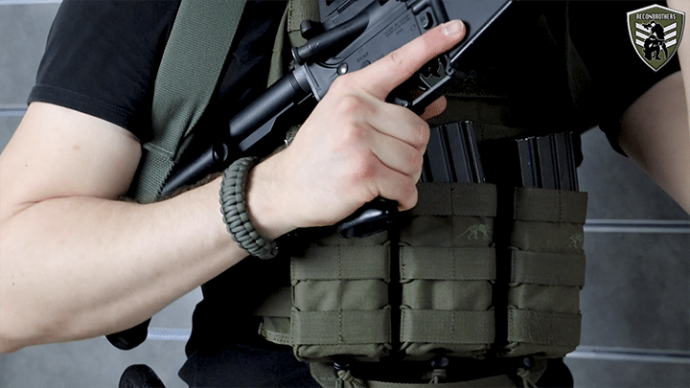
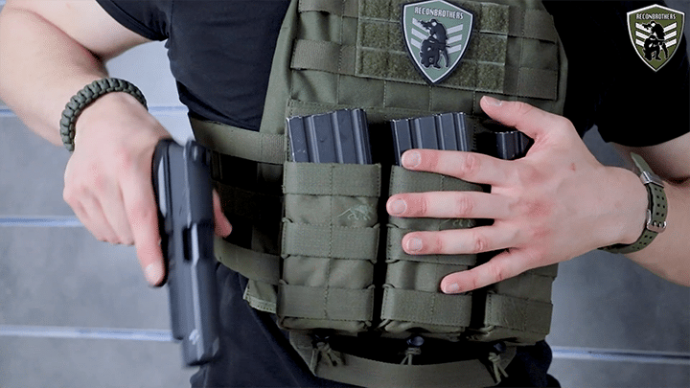
The front panel is the part that you’ll mostly interact with besides your belt. For this you’ll either put things here that need to be easily accessed, especially with your non-dominant hand or things that need some sort of visual reference.
EXAMPLES OF WHAT GOES ON THE FRONT PANEL
For most that’s stuff like magazines, grenades, a notebook and pen, a PTT, a smartphone case or even a small compass.
KEEP IT MINIMALISTIC!
A common sense amongst shooters is to keep your front panel as minimalistic as possible, because the more magazines and pouches you’re stacking onto one another, the more bulkier it will get and the more uncomfortable it will be to go in a prone position.
DANGLER POUCHES
Furthermore, if you want to carry some sort of dangler pouch beneath your plate panel, bear your movement capabilities in mind. Some don’t like them because of that and we personally suggest to first look for other options to store your stuff before considering such a pouch.
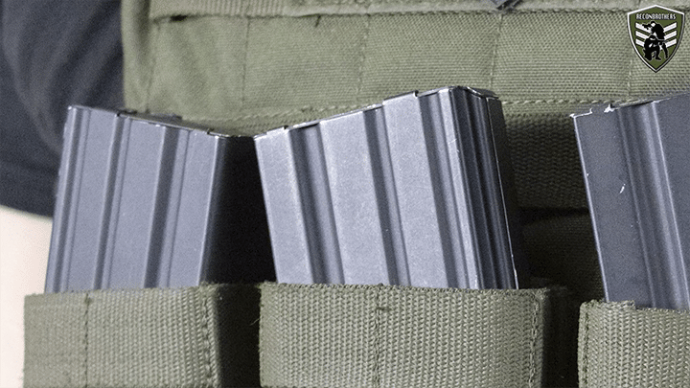
MAG COUNT
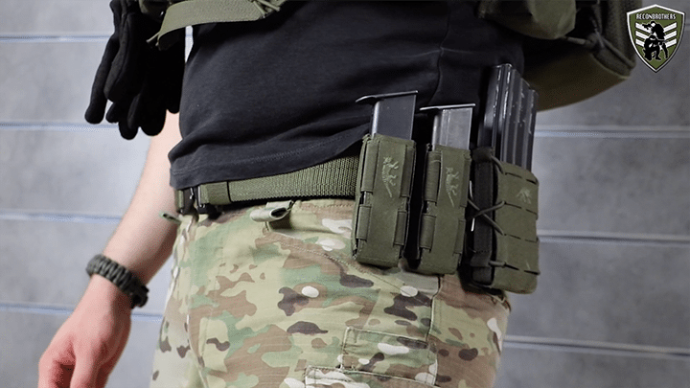
That said, a common mag count for your primary usually lays around 7 magazines. When doing so that usually means 1 mag in the gun, 1 or 2 on your belt and the other 4 or 5 on your carrier of which most on your front panel.
FAST MAG POUCHES
As for which pouches need to be fast mags is something people tend to discuss a lot about.
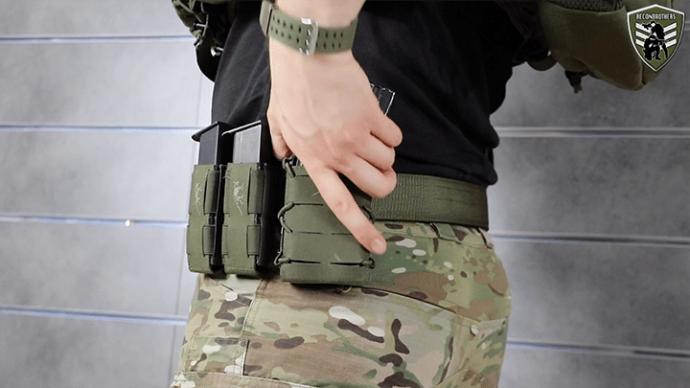
When it comes to your belt, most shooters agree that that’s the fastest way to grab a fresh mag. So it’s definitely recommended to have some sort of fast mag pouches on your belt.
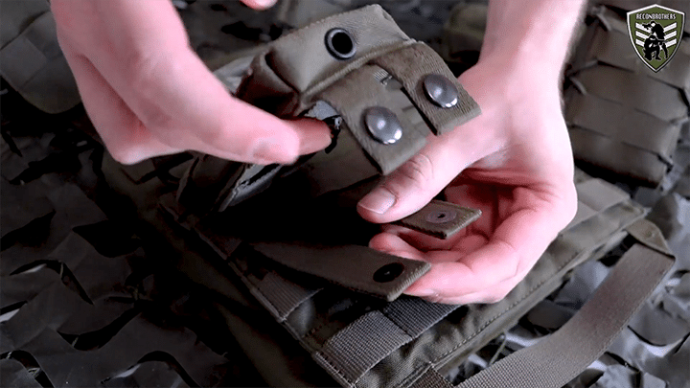
As for your front panel that’s quite a different story, because you sometimes just don’t want to risk losing any magazines by doing certain movements. So, most use Velcro or elastic retained pouches to have a secure retainment, but that gives a lack of speed for doing a reload.
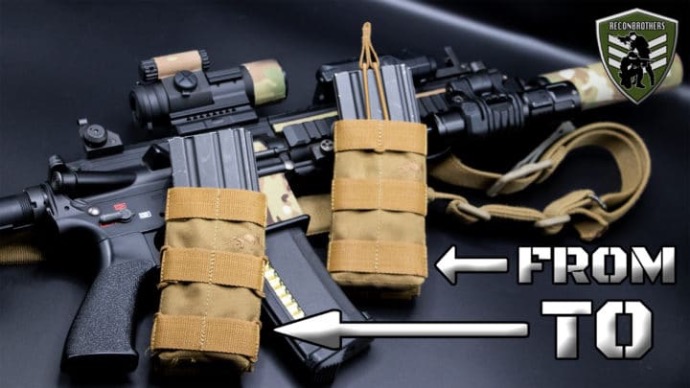
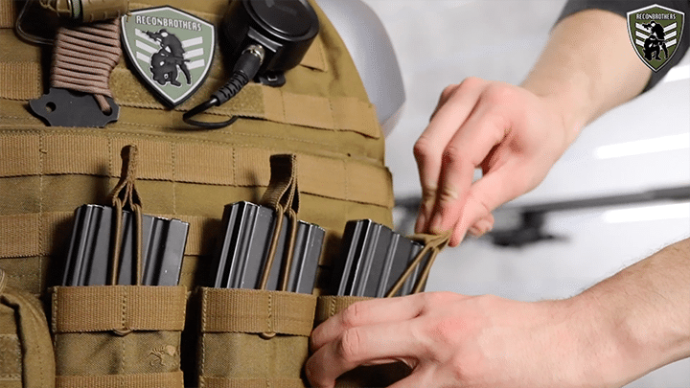
Recently we’ve made a video about a mod to make regular bungee retained pouches into fast mag pouches with enough tension to securely hold your magazines. This mod works equally as good as, if not even better than some fast mag pouches on the market these days. So you might want to check that out. We’ll put the link to this video/blog in the image.
MAGAZINE ORIENTATION

Besides that, also the orientation of your mags usually brings up quite some discussion on what’s best. But it depends on factors like, how you reload and what your dominant side is.
Some guys even like to turn one mag in the opposite orientation than the rest to have the ability to reload with their weak side. But that’s all up to you of course. Now let’s go over to the side panels of your carrier.
5. SIDE PANELS OF PLATE CARRIER
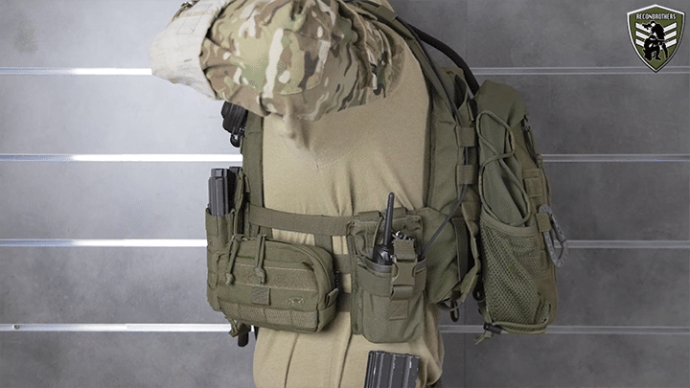
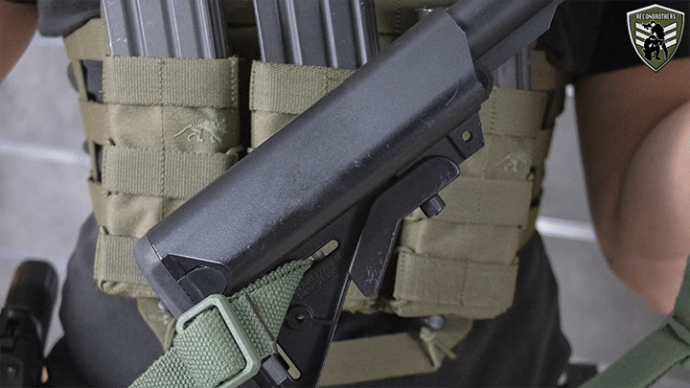
As for the side panels of your carrier you usually want to keep them as empty as possible or at least as slim as possible, especially on your dominant side. This mainly has to do with the interaction of your gun’s buttstock under your armpit and the drawing of your secondary. So, it’s recommended to use your side panels if you run out of options on your front and back panel.
EXAMPLES OF WHAT GOES ON THE SIDE PANELS
For most guys the sides are meant to store medic pouches, tourniquets and radios, which we’ll cover in a bit. Also extra magazines and grenades or other utility pouches are options.
Now that we’ve covered that, let’s go over to the back panel.
6. BACK PANEL OF PLATE CARRIER
The back panel can serve you in a few ways. You either keep it empty for comfort if you have to work a lot in and around vehicles or it can serve as an extra supply platform for your teammates and yourself.
EXAMPLES OF WHAT GOES ON THE BACK PANEL
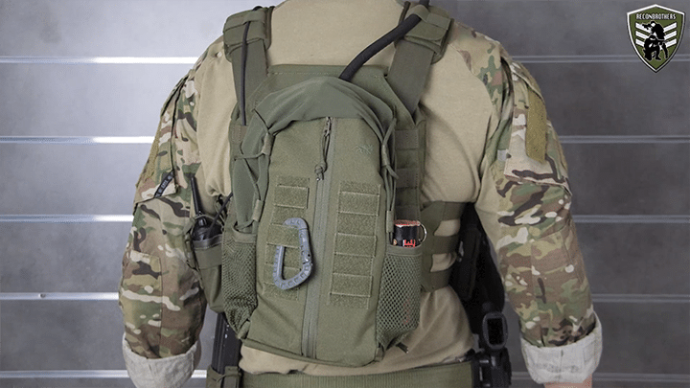
If people do carry something on their back panel it’s usually meant to carry extra magazines and grenades, a radio, medical equipment, breaching equipment, a hydration system, some sort of small MOLLE/PALS attached backpack to store stuff or a bigger backpack to carry more equipment usually for a few days of work.
When we’re talking about a MOLLE/PALS attached backpack it’s best to get one that’s either easy to detach or compressible. This will ensure minimal profiling (and therefore prevent snagging) or allows you to carry a bigger backpack over it if needed.
So, now that we’ve covered all the sides of your carrier we’re going to take a deeper look into a few of the more important things on your kit. We’re not going to cover every single small piece of your kit, because that would take too long, but what we will cover are the overall placements of your communication setup, medical equipment and the conjunction of your kit with your gun sling.
7. MEDICAL EQUIPMENT ON THE PLATE CARRIER
Medical equipment is not as critically important for what we do as it is for the use in the professional world, although a small medical kit can always come in handy.
a. TOURNIQUETS
Anyway, the first medical tool that’s important for anyone working with real bullets is obviously a tourniquet. Usually 1 up to 4 tourniquets are carried by one person. This means always at least one for yourself. But, in some cases also an extra one for another person. Or for extreme scenarios you’ll carry one for each limb which brings the total up to 4.
Tourniquets are usually strapped on the shoulder, on the belt, put inside a medic pouch or on an IFAK, they can also be put in a tourniquet pouch or even on the buttstock of your gun using a rubber band.
b. IFAK
Furthermore, the second thing that should be worn is an IFAK or Individual First Aid Kit which is usually placed where you can reach it by yourself. So somewhere on your belt or along the 180 degree area of your carrier where we’ve talked about earlier.
c. MEDIC POUCH
Besides the IFAK there’s also a medic kit that can be worn by yourself so that a medic can use it on you. If there’s not a lot of space left, it’s best positioned somewhere you don’t need to reach for yourself, so on the back panel or on the back of the side panels of your carrier.
So now that we’ve covered that, we’ll go over to the comms setup.
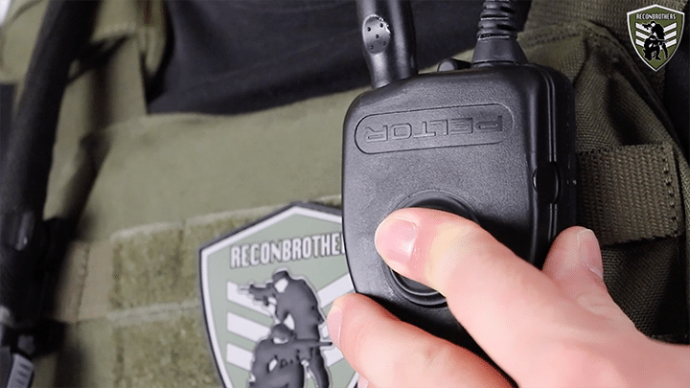
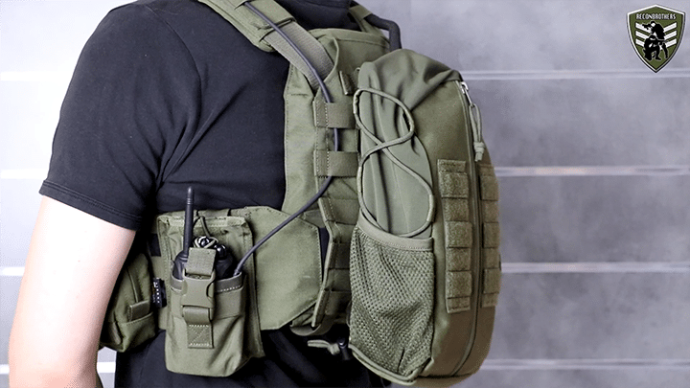
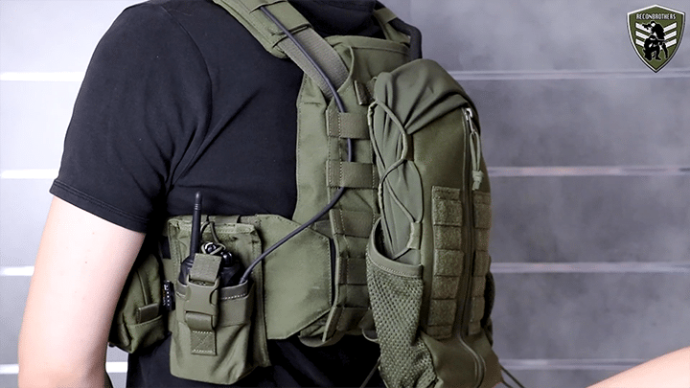
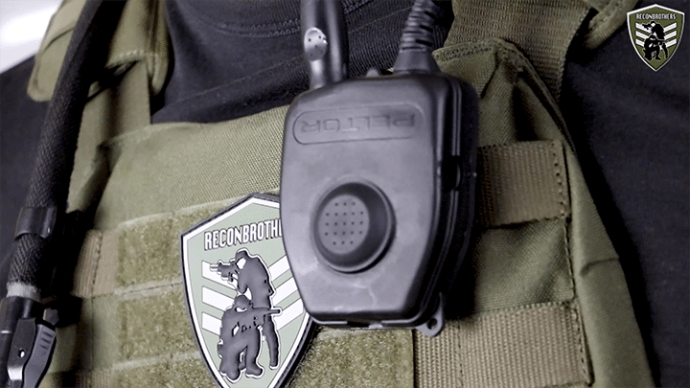
8. COMMS ON THE PLATE CARRIER
For communication there are a few possibilities, namely you can use just a radio on its own or a radio with external PTT and some sort of headset or microphone setup. This last one can also exist in a dual setup as well.
A general rule is to preferably use your non-dominant hand for the use of your communication systems. This so you can always keep a hold on your weapon system with your dominant side.
a. RADIO ONLY
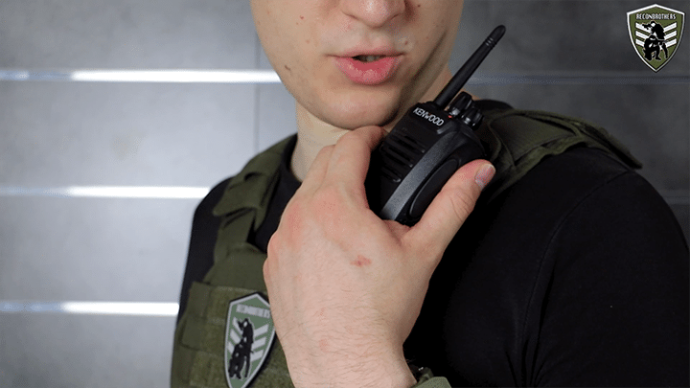
As for the use of a radio on its own, it’s best to place it somewhere on your shoulder or on the front of your carrier as closely as possible to your mouth for speaking.
b. RADIO + PTT/MIC
As for with the use of a PTT, you have 2 options, namely your radio must either be reachable to change frequencies and other stuff or non reachable. In case you need to reach it, you best place your radio up front on your side panel. If not, you can put it somewhere on your back panel or on the backside on one of your side panels.
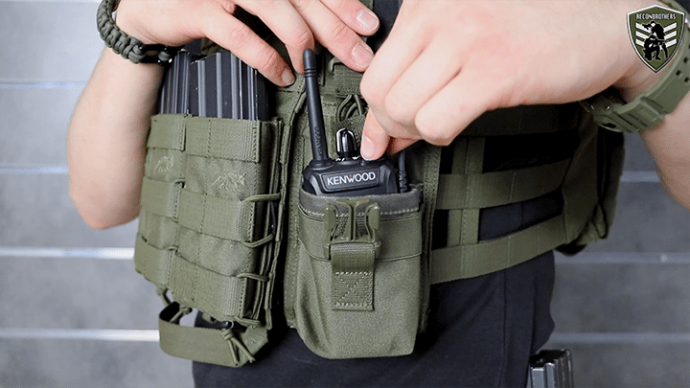
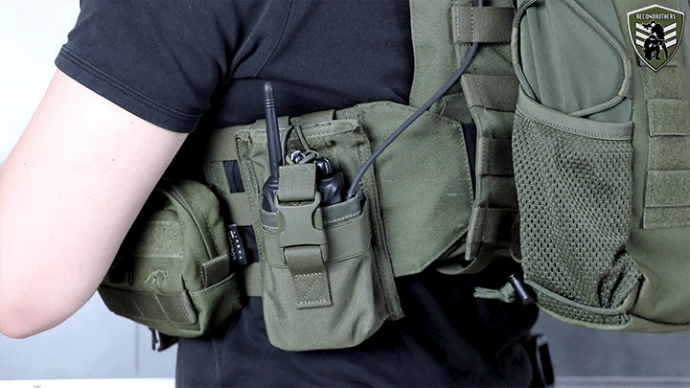
Of course, the PTT itself can also best be placed on your non-dominant side somewhere on the upper part of your front panel. Only once you go to a dual setup you will have to consider putting that extra PTT and radio on your dominant side.
But when doing so, it’s still recommended to place the radio you most often use at your non-dominant side.
Furthermore, one of the last things we’ll cover is the conjunction of this whole plate carrier system with your gun sling.
9. SLING CONJUNCTION WITH THE PLATE CARRIER
When you’re using a plate carrier you’re highly probably also using some sort of primary weapon system. And handling a weapon is always done closely to your body. So the interaction of both your gun and sling with your plate carrier is a very important issue to think about. This way, you don’t get stuck and don’t look stupid when doing serious stuff.
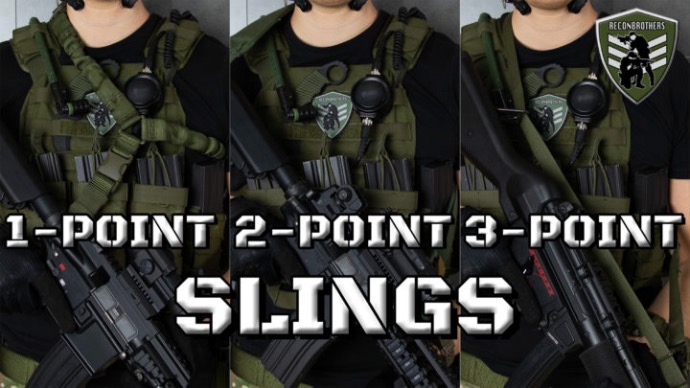
By the way, there are many different sling systems and also different ways to mount one to your gun. If you’ve got no clue for what sort of sling to get and what possibilities and disadvantages they each provide, we’ve already covered that in another video/blog in the past. We’ll put the link on the images below.
a. TESTING SLING CONJUNCTION

Whatever sling system you use, it’s critical to test what you can easily reach on your kit when your weapon is hanging down. You also best test how your sling behaves when you put your buttstock under your armpit for those high-ready positions, switch shoulders to see what happens and learn what happens with your gun and sling if you reach for your secondary.
10. FULLY ATTACH POUCHES
After you’ve done this testing and are certain enough your current kit setup will work for you, you can now fully attach everything to your plate carrier. Once that’s done, the last thing we’ll cover is some more testing to ensure this kit will work for you.
11. TESTING YOUR PLATE CARRIER
Testing your kit is definitely important and will expose flaws that might need some adjustments. Yes, that means detaching and reattaching some stuff, but we’ve tried to save you from that as much as possible.
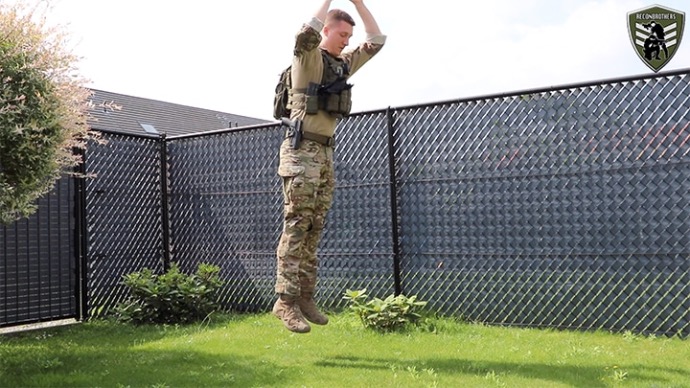
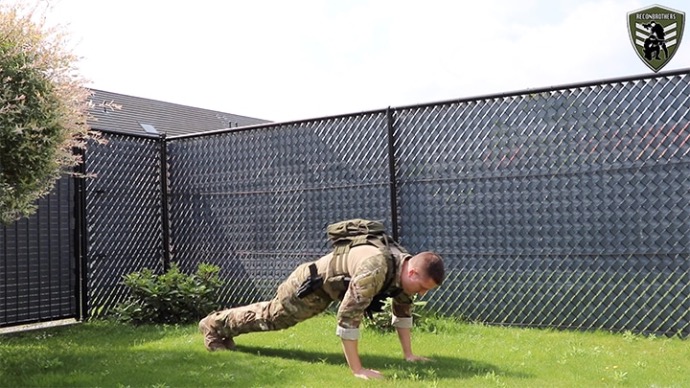
TEST 1: BURPEES
Anyhow, a good way to test your kit is by doing some burpees. This exercise can expose 3 weaknesses:
- When jumping, certain things might start to make too much noise
- You’re making pretty violent movements like this which will test if anything comes loose or falls off of your carrier
- You will notice how easy or difficult it becomes to do those movements with your plate carrier on
TEST 2: RELOADING
Furthermore, another test that’s recommended to do, is to make at least one reload with every single mag pouch. This will show you which are the easiest to reach and what adjustments might be needed.
TEST 3: TRAINING
And at last doing training on a range, dry firing in your kit or doing in-field scenarios might expose some other flaws as well which you’ll have to adjust along the way when you’re progressing further.
So guys, we know it, this blog was quite a lot to cover but hopefully we’ve given some more clearance by taking a different approach. Please mind, we’ve tried to make some base rules in this guide to show you the common sense that goes into it, but there’re always some exceptions that might work better for you.